
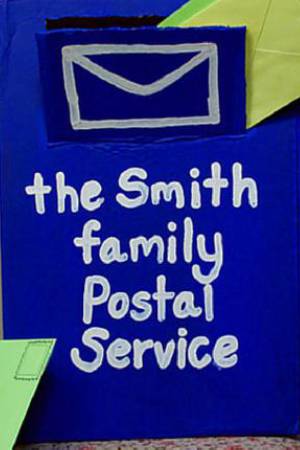
1. Create a home postal service
Ideal for ages 4-6 years
Source: Highlights
*In a nutshell *
Guide children as they create a postal service that runs exclusively for the benefit of those in your home. The post box can have a little bell, when the bell rings, moms and dads know there is a letter (which can be a drawing) in the box for them.
What you will need
- Cardboard box
- Washable paint
- Scissors
How you do it
Send the parents a basic breakdown of what they need, and explain to the parents that this once-off investment of their time will afford them between 20 and 30 minutes of free time per day, because that post box can form an important element in your daily routine.
The first step requires a simple coat of paint (it doesn’t have to be blue) over the box. Then, cut out a slot for the mail and label it as a postbox. As their teacher, you can revisit this post box by encouraging children to write a letter a day, or do a drawing according to a particular theme. Have them post the letter or drawing for mom and dad.

2. Toilet roll binoculars
Ideal for ages 3 and up
Source: Highlights
In a nutshell
There are so many fun arts and crafts activities you can guide children through by getting crafty with toilet rolls. An easy one, creating toilet roll binoculars, involves only a few bare basics, making it mess-free and completely safe.
What you will need
- Empty toilet rolls.
- Pencils, pens, crayons, or markers
- Sticky tape
How you do it
Have the children colour and decorate two toilet rolls each. If there is parental supervision, you can get creative with glue and stick-on decorations. To make this a self-guided activity, keep it simple and easy by providing only crayons, pencils, and pens.
Once they have finished, stick the two rolls of toilet paper together with a slip of sticky tape. Talk about an imaginary jungle or wilderness scene, and what animals you might see through the binoculars.

3. Contact paper suncatchers
Ideal for ages 18 months and up
Source: Frogs and Snails and Puppy Dog Tails
In a nutshell
This classroom activity is easy to adapt for remote connections. With easter around the corner, you can cut the contact paper into egg-shapes and create giant, decorated easter eggs. This activity will thrill the younger and the older children alike.
What you will need
- Contact paper
- Crepe paper (or anything similar, like tissue paper)
- Feathers
- Pieces of tin foil
How you do it
Ask the parents to help you prepare a workspace before your lesson begins. They will need tape the contact paper to the surface the children will be working at, sticky side up. You also need to ask them to have the other materials readily available, each in a bowl or placed in a pile.
Start your remote lesson by getting the children settled. Show the children how they can stick things to the contact paper. Once the egg-shaped contact paper is decorated, seal it by sticking it to a window.
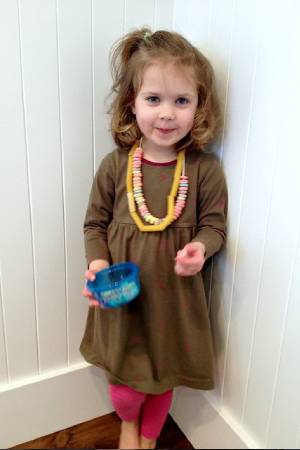
4. DIY pasta necklaces ⏯
Ideal for ages 18 months and up
Source: Andrea Dekker
In a nutshell
It’s an old favourite, but the children don’t know that. For them, a pasta or cereal necklace is a new discovery, something they can enjoy doing on their own.
What you need
- Pasta or pieces of cereal with holes in it, such as Cheerios
- String or yarn
How you do it
Guide the children as they select their pieces of pasta or their cereal and thread them onto their strings. The children will exercise their fine motor skills and practice concentrating. The end result is also edible, if you go with the fruit loops idea.
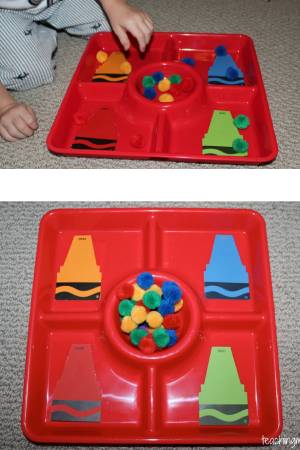
5. Sorting colours
Ideal for ages: 18 months to 3 years
Source: Teaching Mama
In a nutshell
As much as children leave a wake of mess and chaos behind them, they also love to be helpers and tidy up. This sorting activity might not yield a tidy house, but it certainly keeps small hands busy and happy.
What you need
- A tray or a lunch box with divisions
- Colourful pom-poms (you can substitute the pom-poms for any other colour indicator, like pipe cleaners or even paper cutouts.
- Colour swatches
How you do it
Again, ask parents to help you to prepare a workspace. They will need to place a colour swatch in each division on the tray/lunchbox and ask them to have the pom-poms (or substitute) in the middle, together in a bowl.
Once your children are settled and watching you via video, explain that they need to sort out the colours, matching the pom-poms with the colour swatch (ie all the yellow pom-poms go into the division with the yellow colour swatch, red with red, etc).

6. Pine cone bird feeder ⏯
Ideal for ages 4 and up
Source: My Kids Time
In a nutshell
Traditionally a classroom activity, parents and teachers can each fulfil a different role in this activity when it’s done in a virtual classroom. Everyone loves to feed the birds. Creating a natural bird feeder using a pine cone is easy and practically mess-free.
What you need
- A large pine cone
- 1/2 cup vegetable shortening, lard or suet
- 2 and 1/2 cups uncooked oats or cornmeal
- 1/2 cup seeds e.g. sunflower/millet
- Chopped dried fruit/nuts (optional)
- String
How you do it
If you are guiding younger children, ask the parents to help them to tie the string to the pine cone. Older children might not need help with this step. Next, demonstrate to the children how to create the feeding mixture by combining the seeds with the fatty substance you have chosen to use. Encourage them to slather the pine cone in the mixture.
Call on the parents to help children set the pine cone in a window sill or any other safe place and allow it to set a little bit, before they hang it outside. Then, watch all the birds that come to visit!

7. Pipe cleaner structures
Ideal for ages 18 months and up
Source: Frogs and Snails and Puppy Dog Tails
In a nutshell
For us, it looks like art. For little ones, it’s an opportunity to explore the sensory aspects of pipe cleaners in contrast with straws. The way they can bend and maneuver the pipe cleaners will keep them engaged, especially when you’re guiding them via a video call. Older children can create purposeful shapes with artistic flair.
What you need
- Styrofoam for the base (recycle old packaging materials)
- Feathers
- Pipecleaners
- Straws
How you do it
Ask the parents to give the children the styrofoam base and their materials. Start your lesson with a breathe and a stretch to get them focused on you, and then, show them how they can push the decorative elements into the styrofoam, and demonstrate how to bend and shape the pipe cleaners.
Remember to clap and cheer when they create interesting shapes, working virtually means working a little harder to make the lesson engaging.
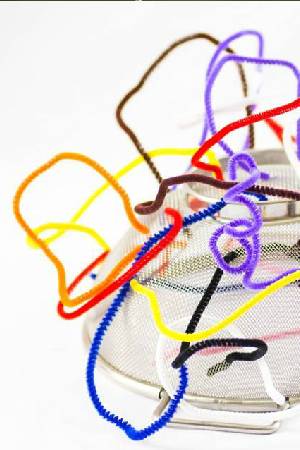
8. Designing silly sieve hats ⏯
Ideal for ages 18 months and up
Source: The Realistic Mama
In a nutshell
It’s so easy, so entertaining for the little ones, and it’s simple to do as part of an online lesson with very young children. Give moms and dads some warning that their kitchen sieve will be in use, because this kitchen utensil will be a popular item for at least a day or two following this activity.
What you need
- A sieve
- A good selection of pipe cleaners (colourful straws make a decent substitute, as do feathers or even leaves, if you don’t have any of the above)
How you do it
Ask parents to hand the children a sieve. In your own setting, you have one handy, too. Talk about it, show them the little holes and ask them to look at the little holes in their own sieve too. Now, show them how it can go onto your head, like a hat. You’ll probably enjoy a few giggles at this part.
When the excitement dies down, remove it from your head and start poking the pipe cleaners (or substitutes) through the little holes. The children usually get excited as soon as they understand what to do. Once all of the pipe cleaners have been used, the children can wear the sieve like a hat.
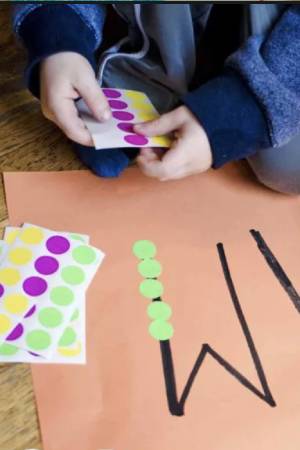
9. Sticker names ⏯
Ideal for ages 4 and up
Source: Busy Toddler
In a nutshell
Exercise fine motor skills, concentration, and provide parents with a few minutes of calm. When it comes to arts and crafts activities especially this activity gives children satisfaction as they decorate their own name and it requires minimal prep from parents as you guide the lesson remotely.
What you need
- Stickers
- Paper
- Children’s names written on the paper in clear and neat lines
How you do it
Ask the parents to write the child’s name on the paper and provide you with plenty of stickers. The stickers can be any colour, but a uniform shape or size is best (square, circles, etc) so that you can get an even and legible outcome. Ask them to write the child’s name with clearly printed letters.
As the teacher, you can talk about how exciting it is for children to write their own name and how they can decorate it to make it truly their own. Now, show the children how to place the stickers neatly over the writing to form their name.

10. Crayon leaf rubbings ⏯
Ideal for ages 2 and up
Source: First Palette
In a nutshell
An activity that requires minimal prep time which means you don’t need to rely on parents. Leaf rubbings can be fun and educational, but if you ask parents to choose crayon colours that work well together (like only cool colours or only warm colours), the end result can be exceptionally artistic.
What you need
- Paper
- Crayons
- Leaves
How you do it
Once the children are ready for your instruction and watching your video call quietly, show them how to place the leaves under their piece of paper. Be very clear when you demonstrate so that they can understand that no two leaves are allowed to touch or overlap. Demonstrate how important it is to rub gently over the page to reveal the beautiful design of the leaves.
Please note: here at Famly we love sharing creative activities for you to try with the children at your setting, but you know them best. Take the time to consider adaptions you might need to make so these activities are accessible and developmentally appropriate for the children you work with. Just as you ordinarily would, conduct risk assessments for your children and your setting before undertaking new activities, and ensure you and your staff are following your own health and safety guidelines.


Get 1000s of free EY activities
Want over 7,000 activities? See them in a free 14-day trial. Filter to target learning areas, age groups and topics, and get inspired.
Get started