
Spooky Halloween science experiments for children
Must-try science experiments for young children to enjoy this Halloween season.

Halloween is one of the most exciting times of the year for young imaginations and it brings all sorts of terrific themes to explore in early education. And with some spooky seasonal twists, you’ve got the chance to engage children with these science activities and experiments!
These Halloween crafts and science experiments will be sure to get little ones excited — so excited, in fact, they might not even notice all the STEM learning going on while they’re playing.
Awesome Halloween science experiments - let’s begin!
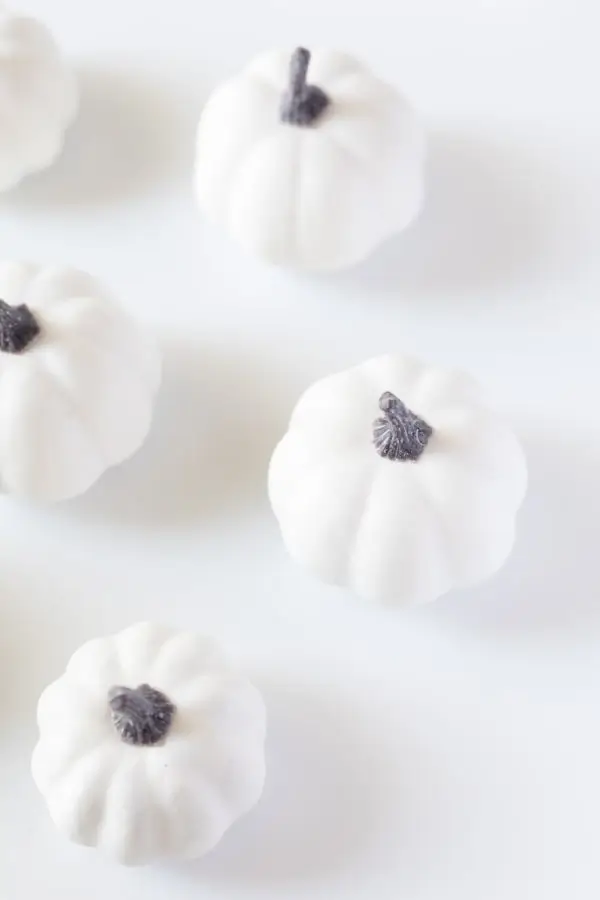
Activity 1: Growing crystal pumpkins
Activity source: Little Bins
The Halloween activity in a nutshell:
Grow your own ghostly crystals on a Halloween pumpkin using simple household ingredients. It's simple to put together and gives you a terrific craft to take home. It's one of the top Halloween crafts that will stay in the children’s minds for years to come.
What you’ll need:
- Small white pumpkin
- Water
- Glass container
- Spoon and tablespoon measure
- Borax powder*
*Safety note: It's best to conduct a risk assessment before using a Borax solution, as it can be toxic in high amounts.
How to do it:
To make your crystal solution, you’ll need 1 cup of water mixed with 3 tablespoons of borax powder. You can make as much as you need, so long as you stick to that same ratio. Because Borax can be toxic, it's best you mix this solution yourself, warning children to keep their distance and to be careful around Borax. Now, let the children place their pumpkins into a glass container and pour the Borax and water solution over until the pumpkin is completely submerged. This is a great opportunity to talk about why some objects float and others don’t, because your pumpkin is likely to pop to the top of the liquid. Keep it submerged by placing a plate over it. Place the container somewhere safe, and watch carefully as tiny crystals grow on the pumpkin over the next 24 hours. The end result gives you beautiful crystal-encrusted pumpkins!
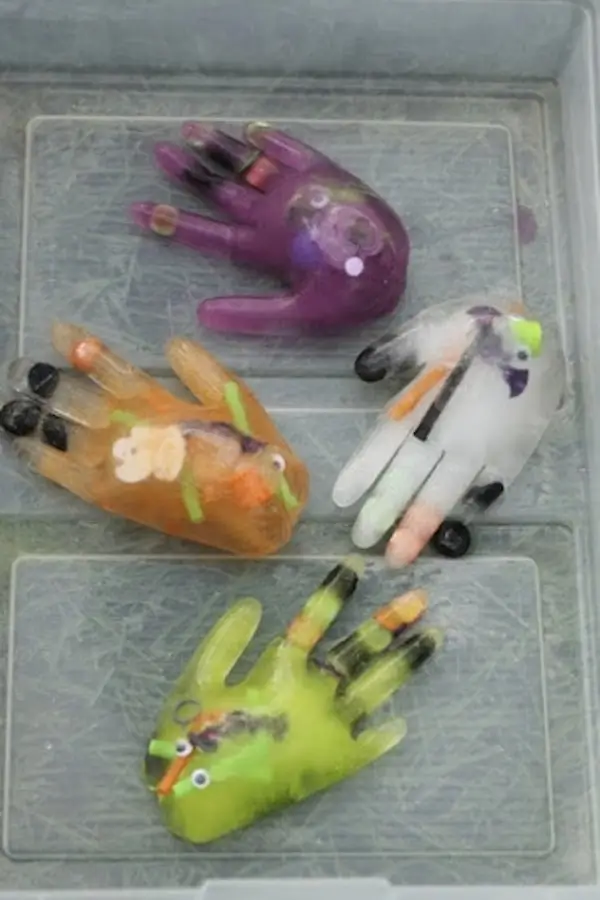
Activity 2: Icy Halloween hands and spooky salt
Activity source: Happy Hooligans
The Halloween activity in a nutshell: These icy hands of Halloween hold many treasures — as many as you can squeeze into one glove! This activity will help little ones explore the different states of water, and to see how ice reacts to salt. It’s also an exciting sensory experience for children, as you’ll find little Halloween treasures frozen in the ice.
What you’ll need:
- Rubber or latex surgical gloves
- Twist ties
- Halloween treasures: beads, buttons, googly eyes, plastic pumpkins, small toy insects and spiders
- Water
- Food coloring
- Salt
- Spoons
How to do it:
Drop your Halloween treasures into the gloves and work them down into the fingertips, and then fill the gloves with water and a few drops of food coloring. Next, give each glove a twist and secure it tightly with a twist-tie, or you can knot the top closed. Place the gloves in the freezer and leave them there overnight. The next day they’ll be solid, so you can remove the gloves. Make several cuts in the glove, from the wrist as far down to the fingers as you can go, making sure to be extra gentle with the frozen fingers. The gloves should peel off easily, giving you icy cold Halloween hands. The next part of the experiment is all about harvesting the Halloween goodies from the frozen hands. Place the hands on the table with containers of salt, and show the children how to sprinkle the salt over the hands to melt the ice and reveal the treasures.
Activity 3: Glow in the dark slime

Activity source: A Pumpkin and a Princess
The Halloween activity in a nutshell:
Anything that glows in the dark is a hit with children, and often with adults too. This ooey-gooey glowy goop is a sensory pleasure for little hands, and its haunting glow will light up young imaginations during the Halloween season.
What you’ll need:
- 2 white bottles
- 3-4 tablespoons glow-in-the-dark paint
- Water
- Neon food coloring
- 1 teaspoon borax
- 1/2 cup warm water
How to do it:
Get the glue bottles completely empty by pouring out the glue into a mixing bowl and using warm water to loosen any remaining glue, and pour that into the mixing bowl too. Stir your food coloring and glow in the dark paint into your glue mixture using a spoon. Young hands can certainly help but remind them not to taste the mixture, as it isn't a cupcake mix. In a small bowl, mix 1/2 cup of warm water with 1 teaspoon of borax. Now you can mix the borax water and glue mixture together, you can use your hands and get messy for this part, it’s an icky-slimy feeling and the children will love it. Use more borax for a stiffer slime, and keep working the mixture with your hands.
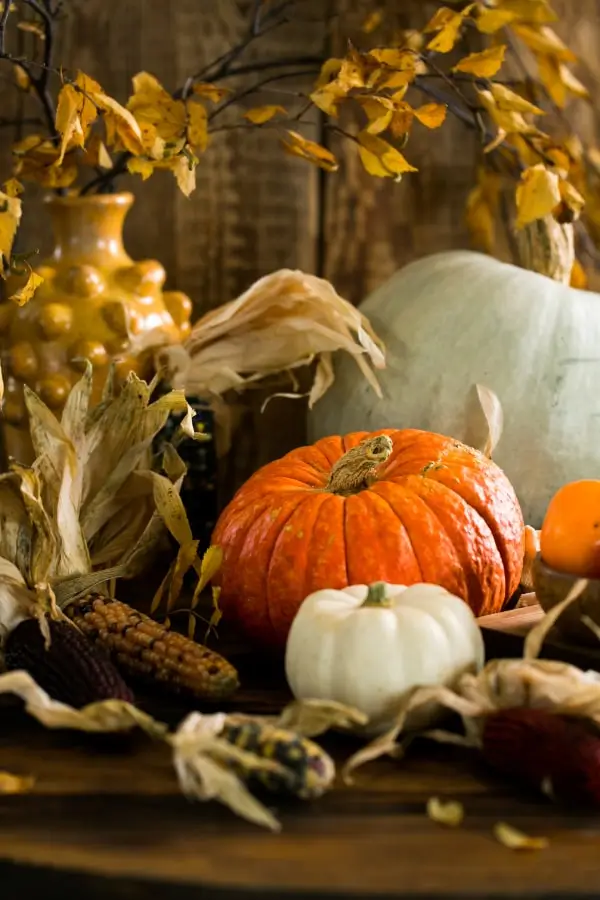
Activity 4: Growing new pumpkins in old pumpkins
Activity source: Life with Moore Babies
The Halloween activity in a nutshell:
A fun way to ponder the circle of life: as your small pumpkins become overripe and reach the end of their life, you can scoop out the insides and use them as containers to cradle the start of life for the next generation of pumpkins. It’s a perfect way to use the mushy pumpkins you’ve got after Halloween season winds down, and to give your green thumbs a go.
What you’ll need:
- Small pumpkins
- Pumpkin seeds
- A spoon for scooping the pumpkin insides out
- Soil or seed starter
- A spray bottle
- A small spade or trowel
How to do it:
Start by cutting the top off of your pumpkins, and scooping out the insides, and collecting all the pumpkin seeds. Have each child put some dirt in a pumpkin — you can use a seed starter to be on the safe side, but pumpkins are supposed to be super easy to grow, so just a little soil will do fine too. Put a pumpkin seed into the soil and water it well. Within a few days, one of the pumpkins will start to show sprouts. Spritz your sprouts regularly to keep them moist and when you see little roots pushing out of the bottom, they’re ready to plant in the garden.
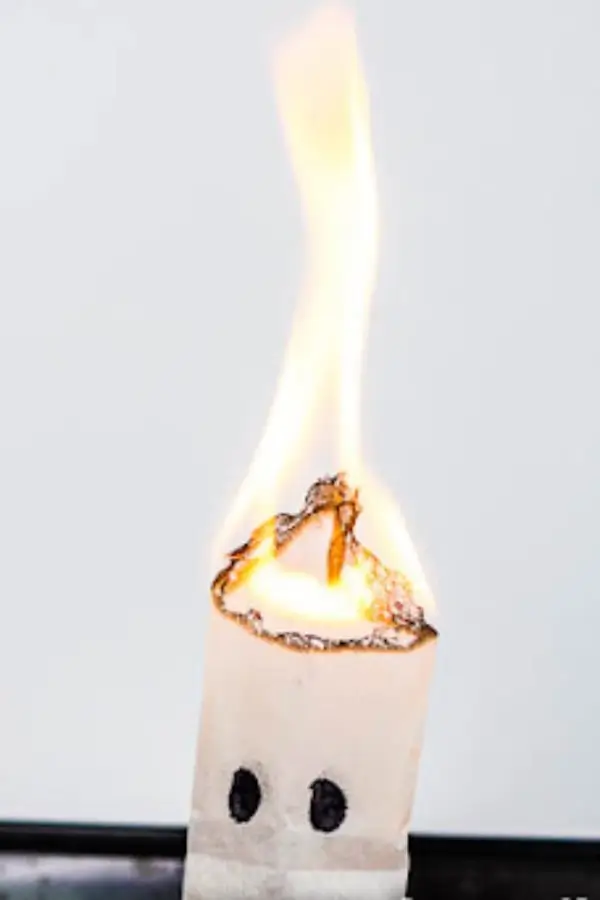
Activity 5: Flying tea bag ghosts experiment
Activity source: Steampowered Family
The Halloween activity in a nutshell:
This one requires some closer adult supervision, as there’s a bit of fire involved — but it’s lots of excitement for little ones. As you watch your ghostly teabags float into the air, it invites a conversation about why they fly in the first place. What is density, anyway?
What you’ll need:
- Teabags, ideally conventional type with folded-over tops
- Scissors
- Baking sheet or another heat-proof surface
- Markers
- Lighter
How to do it:
Cut the string that holds the tea bag closed and empty out the tea. Smooth the tea bags out and place them on a table, and have your little ones decorate ghostly faces and designs with their markers. Then, use your fingers to open up the tea bag so it can stand on its own when placed upright, and set it on a baking sheet. Light the top with a lighter, step back and prepare for the flight. When the flame reaches the base of the tea bag, it will lift off and your ghost will take flight! You and your children can watch the ghost rise, and its ashy remnants float slowly back down.
Activity 6: Density craft experiment
Activity source: Science Sparks
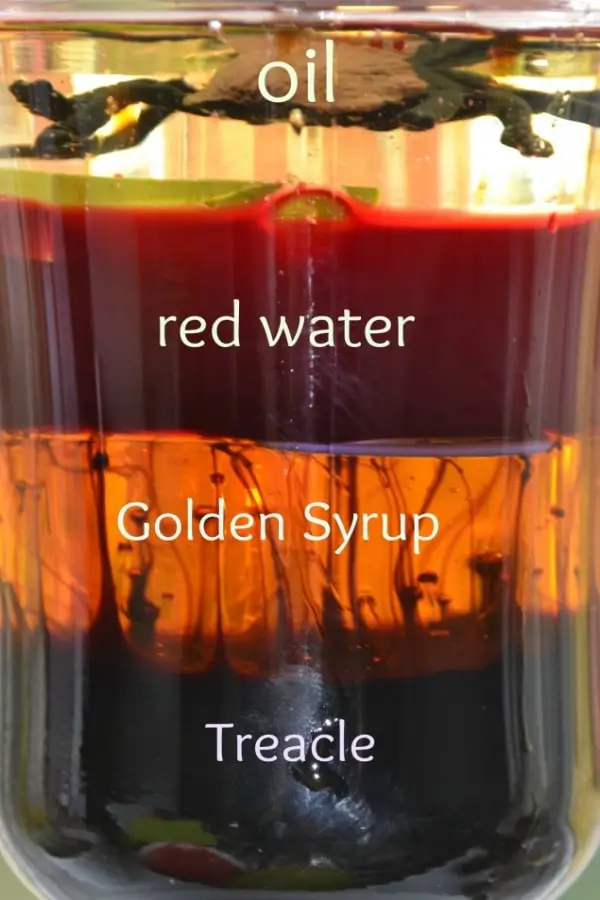
The Halloween activity in a nutshell: Density is a curious concept to explore by itself, and it gets even more engaging for children when you combine it with a Halloween theme. It doesn’t have to be creepy in a scary way, either! With the layered fluids of this sensory toy, you could ask the children to observe how each layer only slightly “creeps” into the next, without actually mixing.
What you’ll need:
- Treacle
- Golden syrup
- Water
- Food coloring
- Vegetable oil
- Small items to test for floating
- A bottle or other see-through container with a lid
How to do it:
Pour each liquid into the container slowly, starting with the treacle. You’ll do golden syrup and water after that. If children are the ones pouring, tell them to pour carefully, and allow each substance to form a layer at the bottom of the glass before they start to pour the next substance. After the treacle and golden syrup, the children can create a third layer by pouring in the water with added food coloring. Finally, add the vegetable oil. Drop a few small (Halloween themed) items in and see which layer they float on. You can ask children to reflect on why these layers don’t mix — or, you can just enjoy the beauty of this spooky fluid sculpture.
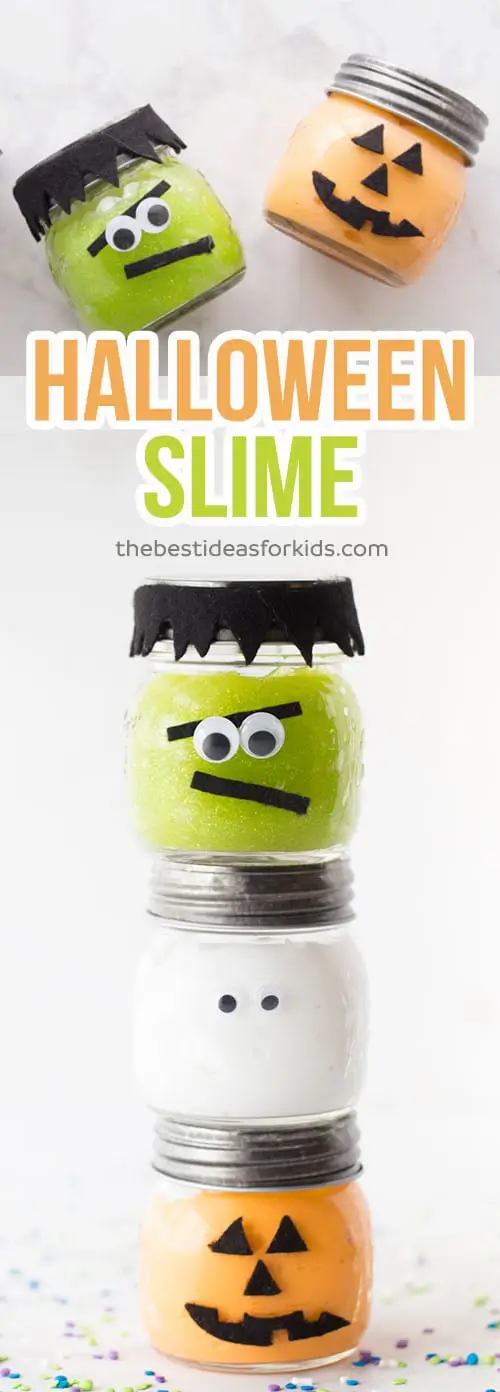
Activity 7: Halloween slime
Activity source: The Best Ideas for Kids
The Halloween activity in a nutshell: The Halloween craft in a nutshell: We all know how much our little ones love slime (even if the adults can’t stand the stickiness and smell all around the classroom and home!). However, this is a great science activity because the slime ultimately goes into a jar, where you can make a pumpkin slime jar, a Frankenstein slime jar and a ghost slime jar. Also, googly eyes, black felt and glue dots are other favorite arts and crafts material that are used in this experiment!
What you’ll need:
- Elmer’s glue (white and/or sparkly green)
- Orange (and green) food coloring
- Baking Soda
- Contact lens solution (specifically with boric acid)
- Water
How to do it:
Firstly, you will need to grab a bowl to mix all the ingredients in. Then, pour 6oz of Elmer’s glue into the bowl. You will use white Elmer’s glue for the ghost and pumpkin slime, but the green sparkly glue for Frankenstein. Or, if you cannot find sparkly green glue, you can simply use green food coloring.
After you have poured the glue into the bowl, you will add the food coloring (depending on which jar you are making). Then, add ½ teaspoon of baking soda, and 2 tablespoons of water. Mix thoroughly. Next, add contact lens solution - remember it must have boric acid so that the slime will form! Keep adding the solution until the slime is at a good stickiness level.
Next, keep mixing until the slime forms and begins to harden. Don’t be afraid to get your hands dirty! You can always have more contact lens solutions if you find it is still too sticky.
Finally, add your facial features to the mason jars!
Please note: here at Famly we love sharing creative activities for you to try with the children at your setting, but you know them best. Take the time to consider adaptions you might need to make so these activities are accessible and developmentally appropriate for the children you work with. Just as you ordinarily would, conduct risk assessments for your children and your setting before undertaking new activities, and ensure you and your staff are following your own health and safety guidelines.

You might also like


Get 1000s of free EY activities
Want over 7,000 activities? See them in a free 14-day trial. Filter to target learning areas, age groups and topics, and get inspired.
Get started